> ## Documentation Index
> Fetch the complete documentation index at: https://openops-ecb4f397-mintlify-add-install-command-explanation-5.mintlify.site/llms.txt
> Use this file to discover all available pages before exploring further.
# OpenOpsApp AWS Role Stack
> How to set up the OpenOpssApp on AWS CloudFormation
The OpenOpsApp role stack for [AWS CloudFormation](https://docs.aws.amazon.com/AWSCloudFormation/latest/UserGuide/Welcome.html) is used to create the `OpenOpsApp` role in your AWS account. This will in turn provide the OpenOps platform with the necessary permissions to connect to your AWS resources.
When creating the stack, you have the option to enable or disable certain permission sets. While the read-only permission set is mandatory, the rest are completely optional. The sets can also be enabled or disabled later by updating the stack.
## Installation
1. Navigate to CloudFormation on your AWS account, in the North Virginia (`us-east-1`) region. You can do so [by clicking here](https://us-east-1.console.aws.amazon.com/cloudformation/home?region=us-east-1). The stack **must** be created in the `us-east-1` region.
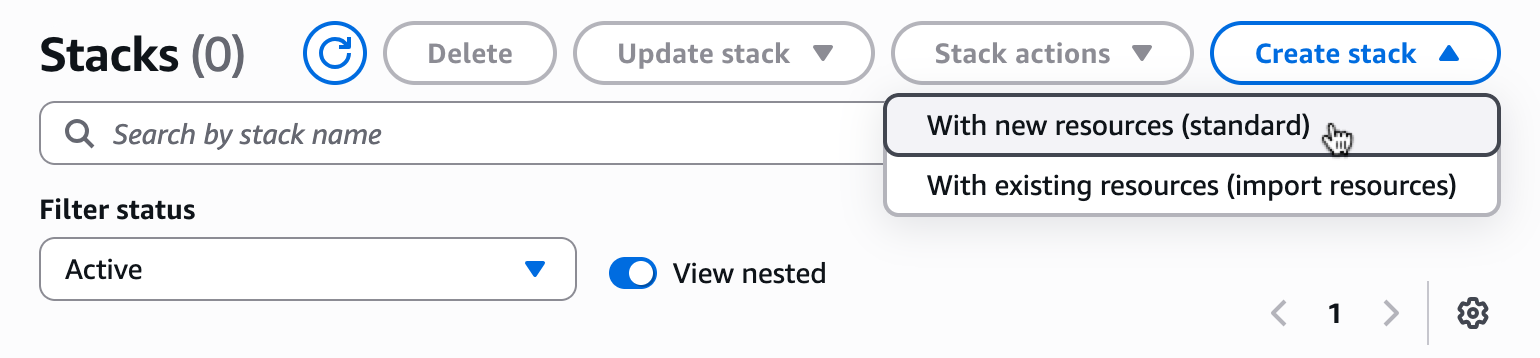
2. Click **Create stack**, then select **With new resources**:
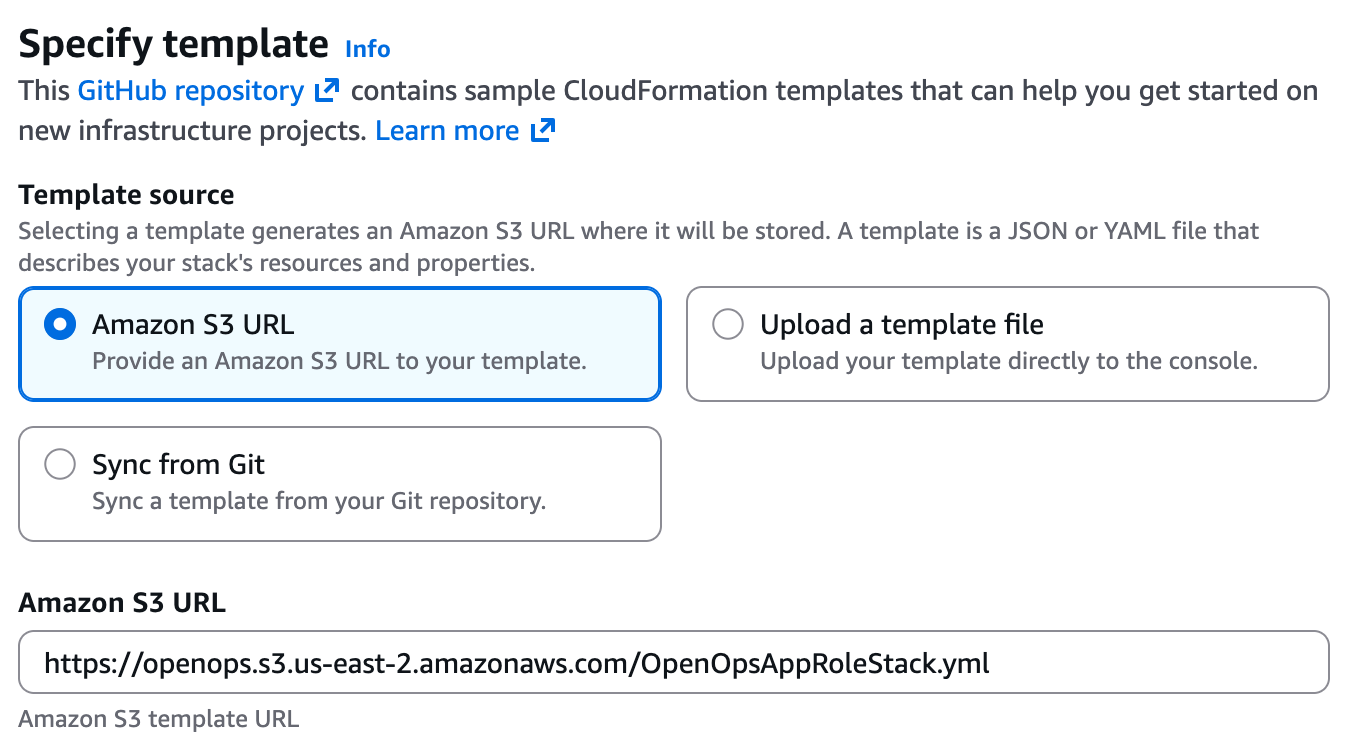
 3. In the **Amazon S3 URL** field, insert the following URL: `https://openops.s3.us-east-2.amazonaws.com/OpenOpsAppRoleStack.yml`, then click **Next**.
 4. Give a name to the stack, such as `OpenOpsApp`. Enter an AWS account ID that you want OpenOps to use. Modify the permission sets if you like, then click **Next**.
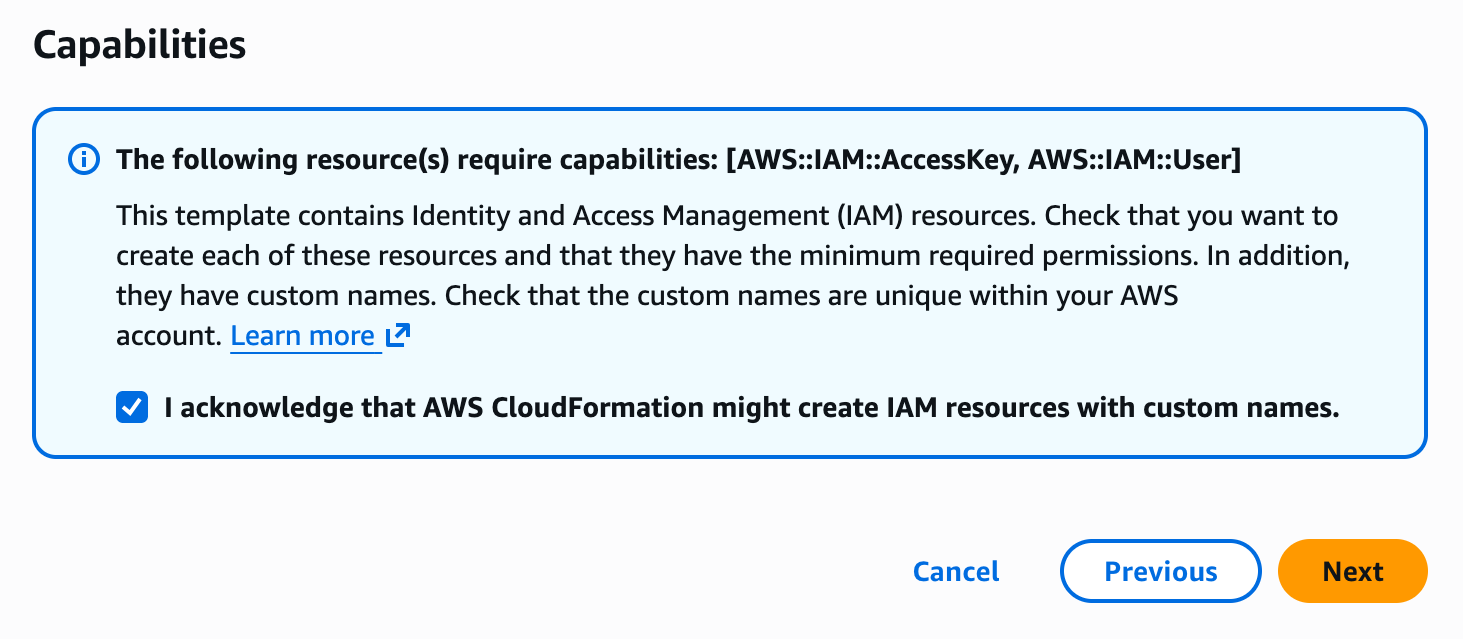
5. Scroll down to the **Capabilities** section, acknowledge the creation of the necessary IAM roles, then click **Next**:
4. Give a name to the stack, such as `OpenOpsApp`. Enter an AWS account ID that you want OpenOps to use. Modify the permission sets if you like, then click **Next**.
5. Scroll down to the **Capabilities** section, acknowledge the creation of the necessary IAM roles, then click **Next**:
 6. In the **Review and create** view, scroll down and click **Submit**. The stack will be created, including the `OpenOpsApp` role and the requested permissions.
## Modification
You’re welcome to [download the stack](https://openops.s3.us-east-2.amazonaws.com/OpenOpsAppRoleStack.yml) and modify specific permissions according to your needs. Notice that some AWS components in the OpenOps workflows may not function properly as a result.
## Support
Feel free to join our [Slack community](https://slack.openops.com) if you have any questions or need help with your installation.
6. In the **Review and create** view, scroll down and click **Submit**. The stack will be created, including the `OpenOpsApp` role and the requested permissions.
## Modification
You’re welcome to [download the stack](https://openops.s3.us-east-2.amazonaws.com/OpenOpsAppRoleStack.yml) and modify specific permissions according to your needs. Notice that some AWS components in the OpenOps workflows may not function properly as a result.
## Support
Feel free to join our [Slack community](https://slack.openops.com) if you have any questions or need help with your installation.